
The Openfort wallet widget is evolving from a balance viewer into a fully actionable financial console. Developers can now offer native "Send" and "Receive" capabilities directly within their applications, eliminating the need for custom transaction flows or external redirects.
How to Send and Receive Assets in Openfort UI?
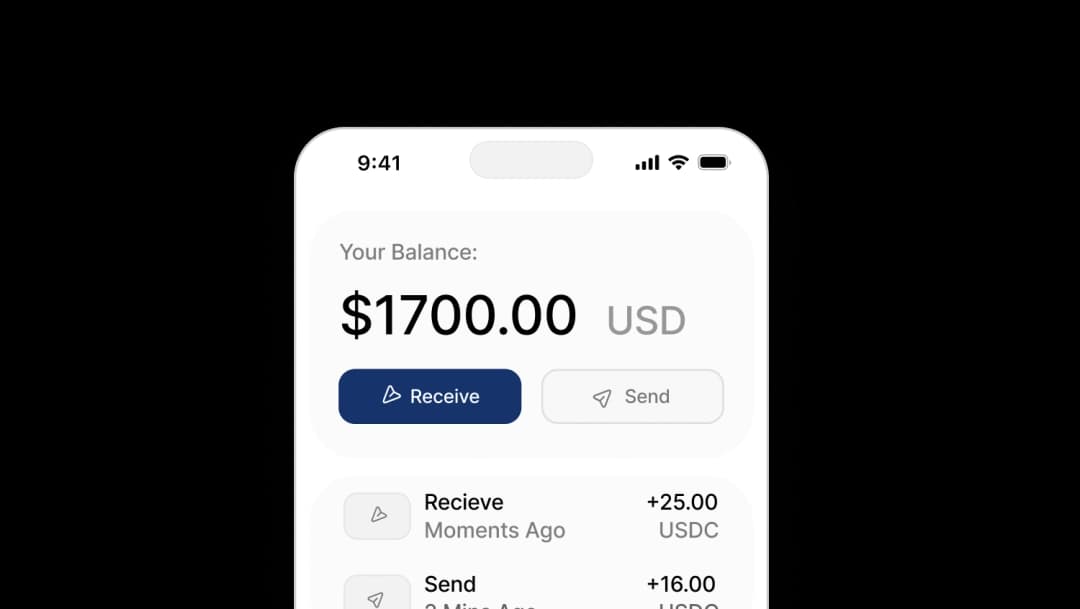
To send and receive assets using the Openfort UI, developers simply need to enable the latest features in the Openfort React SDK. The updated wallet widget includes built-in buttons for "Send" (allowing users to transfer assets like USDC or ETH by pasting an address) and "Add Funds" (providing a clear deposit address, QR code, and integrated fiat-to-crypto onramps like Stripe or Coinbase). Because these actions are powered by Openfort’s underlying orchestration layer, features like gas sponsorship and session management are automatically applied, ensuring that users can move funds seamlessly without ever leaving the application's interface.
Until now, teams using the Openfort UI leaned on the wallet modal mainly for connecting, showing balances, and — for many of you — using our ConnectKit-based flow plus account linking to bridge embedded wallets with users’ existing self-custodial wallets. That got you smooth onboarding and a consistent UX layer, but there was still a missing piece:
once users had an embedded wallet, it wasn’t straightforward enough for them to fund it, move assets, or cash in directly from the same interface.
We’ve fixed that.
This update turns the Openfort wallet widget from a passive viewer into an actionable money console — without you rebuilding flows from scratch.
From “Connect & View” to “Connect, Fund & Move”
The first version of our wallet UI was built around three core ideas: give you embedded wallet UX out of the box, plug into ConnectKit so users could connect their own wallets with a familiar flow, and expose link account functionality so you could associate an existing EOA with the embedded wallet behind the scenes.
That combination worked well for onboarding and identity. Users could log in with your auth, automatically get an embedded wallet, optionally link a wallet they already trust, and start interacting with your app without dealing with seed phrases or clunky redirects.
But as teams went to production, the same practical questions kept coming up: how do you let users top up their embedded wallet without sending them through a maze of screens? Can they send assets directly from the same modal they already trust? Can you plug in onramps without building and maintaining a separate UI for each provider?
This release is our answer.
What’s new in the wallet widget
Send assets directly from the wallet modal
Users can now send assets from inside the Openfort wallet widget itself — no new pages, no extra context switching.
From the same modal they already use to view balances, a user can open their wallet, tap “Send”, choose an asset like USDC, ETH, or your in-game token, select or paste a recipient address, and confirm the transaction. That’s it.
Under the hood, nothing in your architecture needs to change. You keep using the same policies and orchestration you’ve already set up with Openfort: paymasters, sponsored gas, embedded wallets, smart accounts, and whatever routing you’ve already wired into your app. The widget becomes the front door for money actions, while all the rules and logic remain fully under your control.
If you’re already running embedded wallets and account abstraction with Openfort, this should feel like adding one more capability to your existing setup, not starting a new integration.
Receive assets: external wallets and onramping built in
Funding is where most teams quietly lose users. We’ve pulled the two most common funding paths into the wallet modal so you can keep people in one place.
For users who already have assets elsewhere, the widget now exposes the embedded wallet address clearly, with copy and QR options, and guides them to the right network so they don’t mis-send. Everything lives inside the same UI they already trust, so “send tokens here” becomes a natural part of their experience instead of a separate flow you have to explain.
For users coming in with fiat, you can connect Coinbase or Stripe-powered onramps directly from the wallet widget. The flow is simple: the user opens the modal, hits an “Add funds” entry point, chooses the onramp, goes through the provider’s payment flow, and ends up with funds sitting in the embedded wallet you control at the infra level.
You decide which providers to enable per environment, market, or chain. The widget takes care of the UX and wiring so it all feels like one coherent flow. You don’t need to design a custom “Deposit” section or maintain one-off integrations for each provider — you just configure your options and let the widget handle the rest.
How it fits with the Openfort React SDK and linked accounts

If you’re already using our React SDK with ConnectKit and link account features, this update is an extension of that stack, not a replacement.
The linked wallet can still act as a familiar anchor for power users who want to bring their own EOA. The embedded wallet remains your programmable, upgradeable, policy-driven account under the hood. And the Openfort widget becomes the shared surface where those worlds meet: users can view balances, link accounts, send assets, and receive funds via external transfers or onramps, all in one place.
On your side, you still control which chains and tokens are available to send, whether gas is sponsored or user-paid, which onramp providers appear, and how the whole flow ties into your auth and account model. The goal is simple: minimal configuration, maximum effect.
Why this matters
For developers and product teams, this cuts down the surface area you have to maintain. Instead of separate UIs for “Balances,” “Deposit,” and “Send,” you configure a single, consistent widget. All those flows run through the same infra stack — your rules, your paymasters, your monitoring — so you don’t end up with fragmented policies or duplicated logic. And when you want to experiment, you can turn providers or flows on and off without redesigning core UX.
For users, it creates a much clearer mental model: this is my wallet inside this app, and this is where I see, fund, and move assets. They get one familiar interface for money actions, fewer redirects, and fewer unknown brands in the middle of what should be a simple transaction.
For your roadmap, this release lays the groundwork for richer embedded wallet interactions: streaming payments, in-app marketplaces, cross-chain flows, and agent-triggered actions can all slot into the same wallet surface instead of spawning new, disconnected experiences.