Quickstart: Backend wallet
This guide will walk you through creating and managing backend wallets using the Openfort Node SDK.
Install dependencies
Create a backend wallet
Backend wallet (dac) can be used for escrow, minting, and transferring assets. You can create a new custodial backend wallet or add your own external account by providing a signature and address.
const developerAccount = await openfort.settings.createDeveloperAccount({
name: "Minting Account"
});
console.log("Success! Here is your backend wallet id: " + developerAccount.id);Add a contract to Openfort
We'll use a simple ERC-721 contract on the Polygon Amoy network.
Once added, Openfort will return a contract id that starts with con_.
curl https://api.openfort.io/v1/contracts \
-H "Authorization: Bearer $YOUR_SECRET_KEY" \
-d chainId=80002 \
-d address="0x2522F4Fc9aF2E1954a3D13f7a5B2683A00a4543A" \
-d abi=[
{
"inputs": [
{
"internalType": "address",
"name": "_to",
"type": "address"
}
],
"name": "mint",
"outputs": [],
"stateMutability": "nonpayable",
"type": "function"
}
] \
-d name="Simple NFT"Mint an NFT using the backend wallet
Use your backend wallet to mint an NFT. The wallet will be used to pay for gas fees.
Make sure to replace the contract id with your own.
const contractId = "con_...";
const chainId = 80002;
const optimistic = false;
const tokenId = '1'; // Token ID to mint, should be unique
const interaction_mint = {
contract: contractId,
functionName: "mint",
functionArgs: [developerAccount.address, tokenId],
};
const transactionIntent = await openfort.transactionIntents.create({
"account": developerAccount.id,
"chainId": chainId,
"optimistic": optimistic,
"interactions": [interaction_mint]
});
console.log("Success! Here is your transactionIntent id: " + transactionIntent.id);Verify wallet ownership
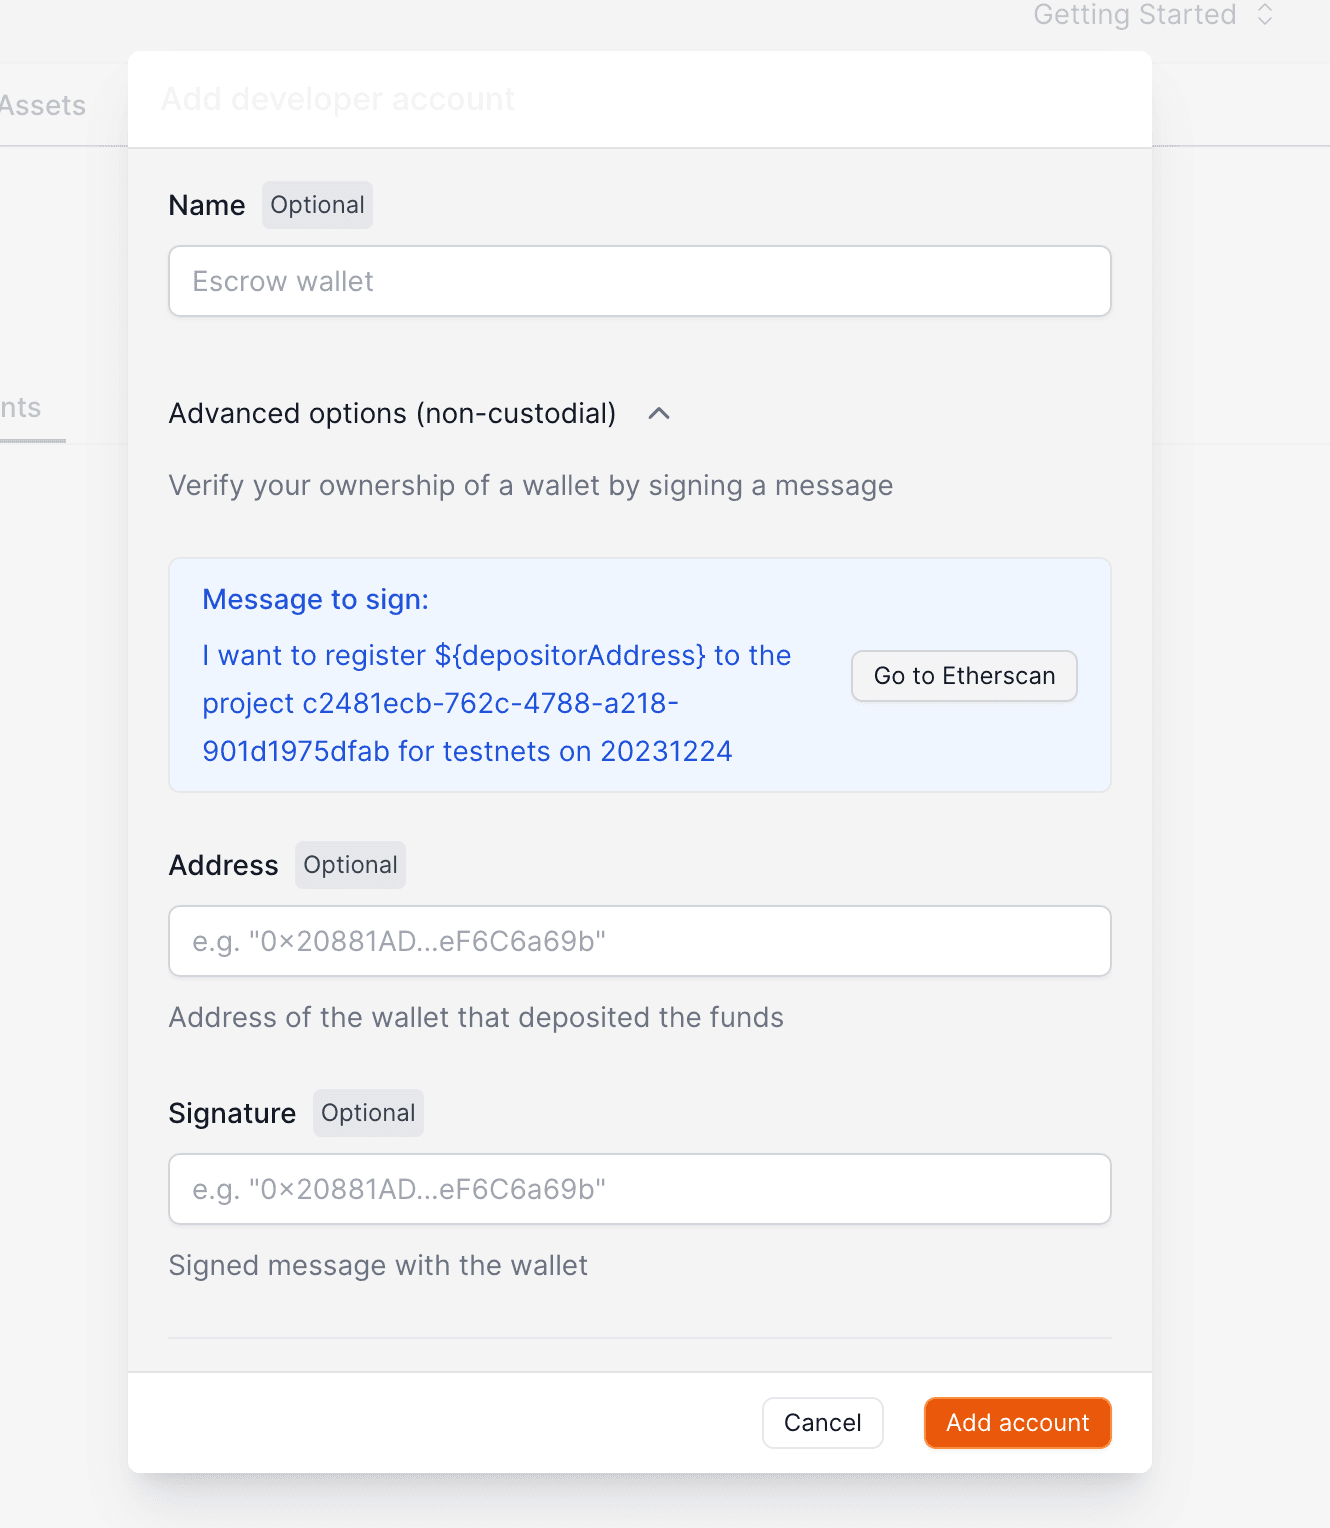
If you're looking to sponsor gas with your native tokens for smart accounts, it's important to verify your deposited funds with the paymaster.
Head to backend wallets in your dashboard and click on Add wallet.
- Click on
Import a walletto start the process. - Click
Go to Etherescanand sign the message. - Copy the signed message and paste it in the dashboard.
- Add the wallet address used to deposit native tokens.
- Add the signed message.

Optional: Custom forwarder contract
By default you can use the supported forwarder contracts from Openfort if you need.
Alternatively, you can also use your forward contract in order to sponsor the transaction of your backend wallet. Go to your Gas policy section and create a policy by adding the address of your Forwarder contract address.

