# Provider migration
This tool links users from one authentication provider to another, ensuring a smooth transition without losing any user data.
This guide demonstrates creating a migration from an **OIDC provider** with Google OAuth flow to **Openfort Google provider**. This is useful for migrating users from a custom OIDC provider to Openfort's Google provider.
## Creating a migration
1. Enable both your source and destination providers in the Openfort dashboard.
You can do this in the [Providers](https://dashboard.openfort.io/providers) section of your Openfort dashboard.
2. Start by going to the [Migration page](https://dashboard.openfort.io/players/auth/migrations) in your Openfort dashboard and create a new one.
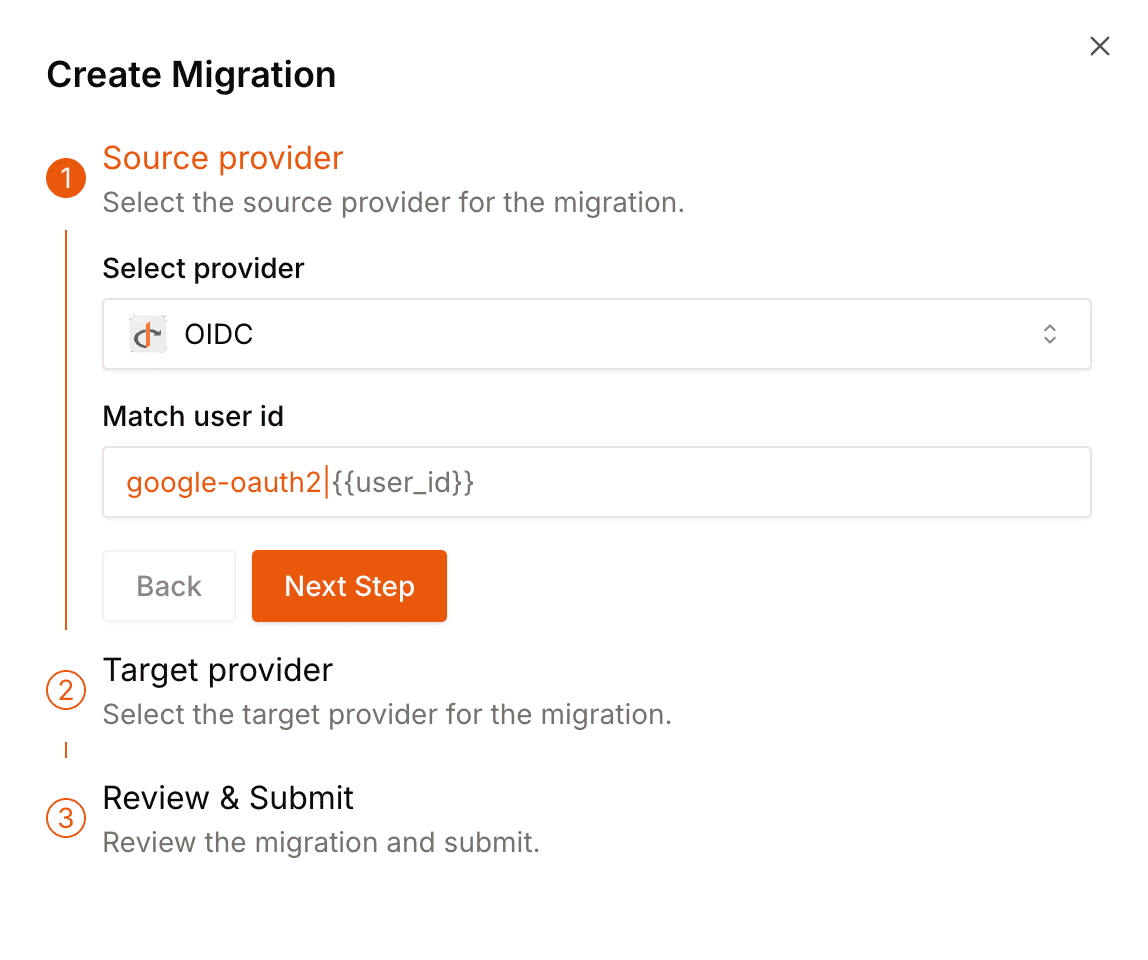
3. Select the source and destination providers, and add the matching criteria for the users you want to migrate.
4. Do the same for the destination provider.
5. Click on **Create migration**.
6. Start the migration by clicking **Start migration**, next to **Ready to start**.
7. When a user logs in with **Openfort Google provider**, they are automatically linked to their OIDC account.
When all users are migrated, mark the migration as complete by clicking **Mark as complete**.