# Using session keys in Unity
In-game keys are specialized access tools assigned with specific in-game permissions, tailored for enhancing gaming experiences. Examples include:
* A key that grants access only to specific game levels or areas.
* A key that allows the use of up to 1000 in-game currency units.
* A key that remains valid for three days before expiring.
:::note
For a general overview of session keys, see the [Session keys](https://www.openfort.io/blog/technical-dive-session-keys) post.
:::
:::info
There are two types of session keys in Openfort: client session keys and server session keys.
* **Server session keys** are created on the client by a key pair and send the address computed to the server.
:::
## Configuration
This section guides you through the process of registering a session key and using it to mint an asset with a user's smart account.
### 1. Create a session key Server side
:::details\[Viem create session key]
```tsx
import { generatePrivateKey, privateKeyToAccount } from 'viem/accounts';
const sessionKey = generatePrivateKey();
const accountSession = privateKeyToAccount(sessionKey).address;
```
:::
:::details\[Ethers create session key]
Using [ethers](https://www.npmjs.com/package/ethers), you can create a key pair on the server side of your application.
```ts
const sessionKey = ethers.Wallet.createRandom();
```
:::
The parameter `sessionKey` contains the address that you need to register.
After creating the session key, you can go ahead and register it.
### 2. Register a session key - Server side Client side
To register a session key, first send the address from the session key to your server.
You can get the address from the session key object created above like this:
```csharp client.cs
string address = sessionKey.Address;
```
Then, from your server you can make a request to the Openfort API or use one of our server libraries to register the session key.
Install Openfort in your server-side and initialize it with your secret key.
```bash [node]
npm install @openfort/openfort-node
```
Initialize '@openfort/openfort-node' with your secret key.
```ts [server.ts]
import Openfort from "@openfort/openfort-node";
const openfort = new Openfort("sk_test_...");
```
The created session key would be valid starting from timestamp `1685001000` (May 25, 2023 7:50 GMT) and expire at timestamp `1685004600` (1 hour later).
For a useful resource to calculate timestamps online, visit [UNIX Timestamp](https://www.unixtimestamp.com/).
Also, note how a `policy` is used to indicate the gas sponsorship that covers the gas fees of the transaction to register the session key.
Register the session key using Openfort:
:::code-group
```bash [curl]
curl https://api.openfort.io/v1/sessions \
-H "Authorization: Bearer $YOUR_SECRET_KEY" \
-d address="0x76e6...9341" \
-d chainId=80002 \
-d validUntil=1685004600 \
-d validAfter=0 \
-d account="acc_..." \
-d policy=pol_...
```
```ts [node]
const accountId = 'acc_...'
const chainId = 80002
const sessionKeyAddress = '0x76e6...9341'
const policyId = 'pol_...'
const validUntil = 1685001000
const validAfter = 0
const session = await openfort.sessions.create({
account: accountId,
address: sessionKeyAddress,
chainId: chainId,
validUntil: validUntil,
validAfter: validAfter,
policy: policyId,
})
```
:::
### 3. Authorize the session key - Client side
The owner of the account needs to authorize the new session key.
To do so, sign the `signableHash` from the `nextAction` object returned by the API call to register the session key.
```json
"nextAction": {
"type": "sign_with_wallet",
"payload": {
"signableHash": "0x91b4efe3648c79467f7b50aa9bb1b4eae383a52dd6d741d39ece29ed2ef8362d"
}
},
```
Once signed by the owner signer of the account,
send it to Openfort using the endpoint `/v1/sessions/:id/signature` as shown below:
```bash [curl]
curl https://api.openfort.io/v1/sessions/ses_.../signature \
-H "Authorization: Bearer $YOUR_PUBLISHABLE_KEY" \
-d signature="xyz..."
```
```csharp [client.cs]
// Use SendSignatureTransactionIntentRequest to sign and submit
// the session key authorization from the client side
var request = new SignatureTransactionIntentRequest(
transactionIntentId: session.id,
userOperationHash: SIGNED_USER_OP_HASH
);
await openfort.SendSignatureTransactionIntentRequest(request);
```
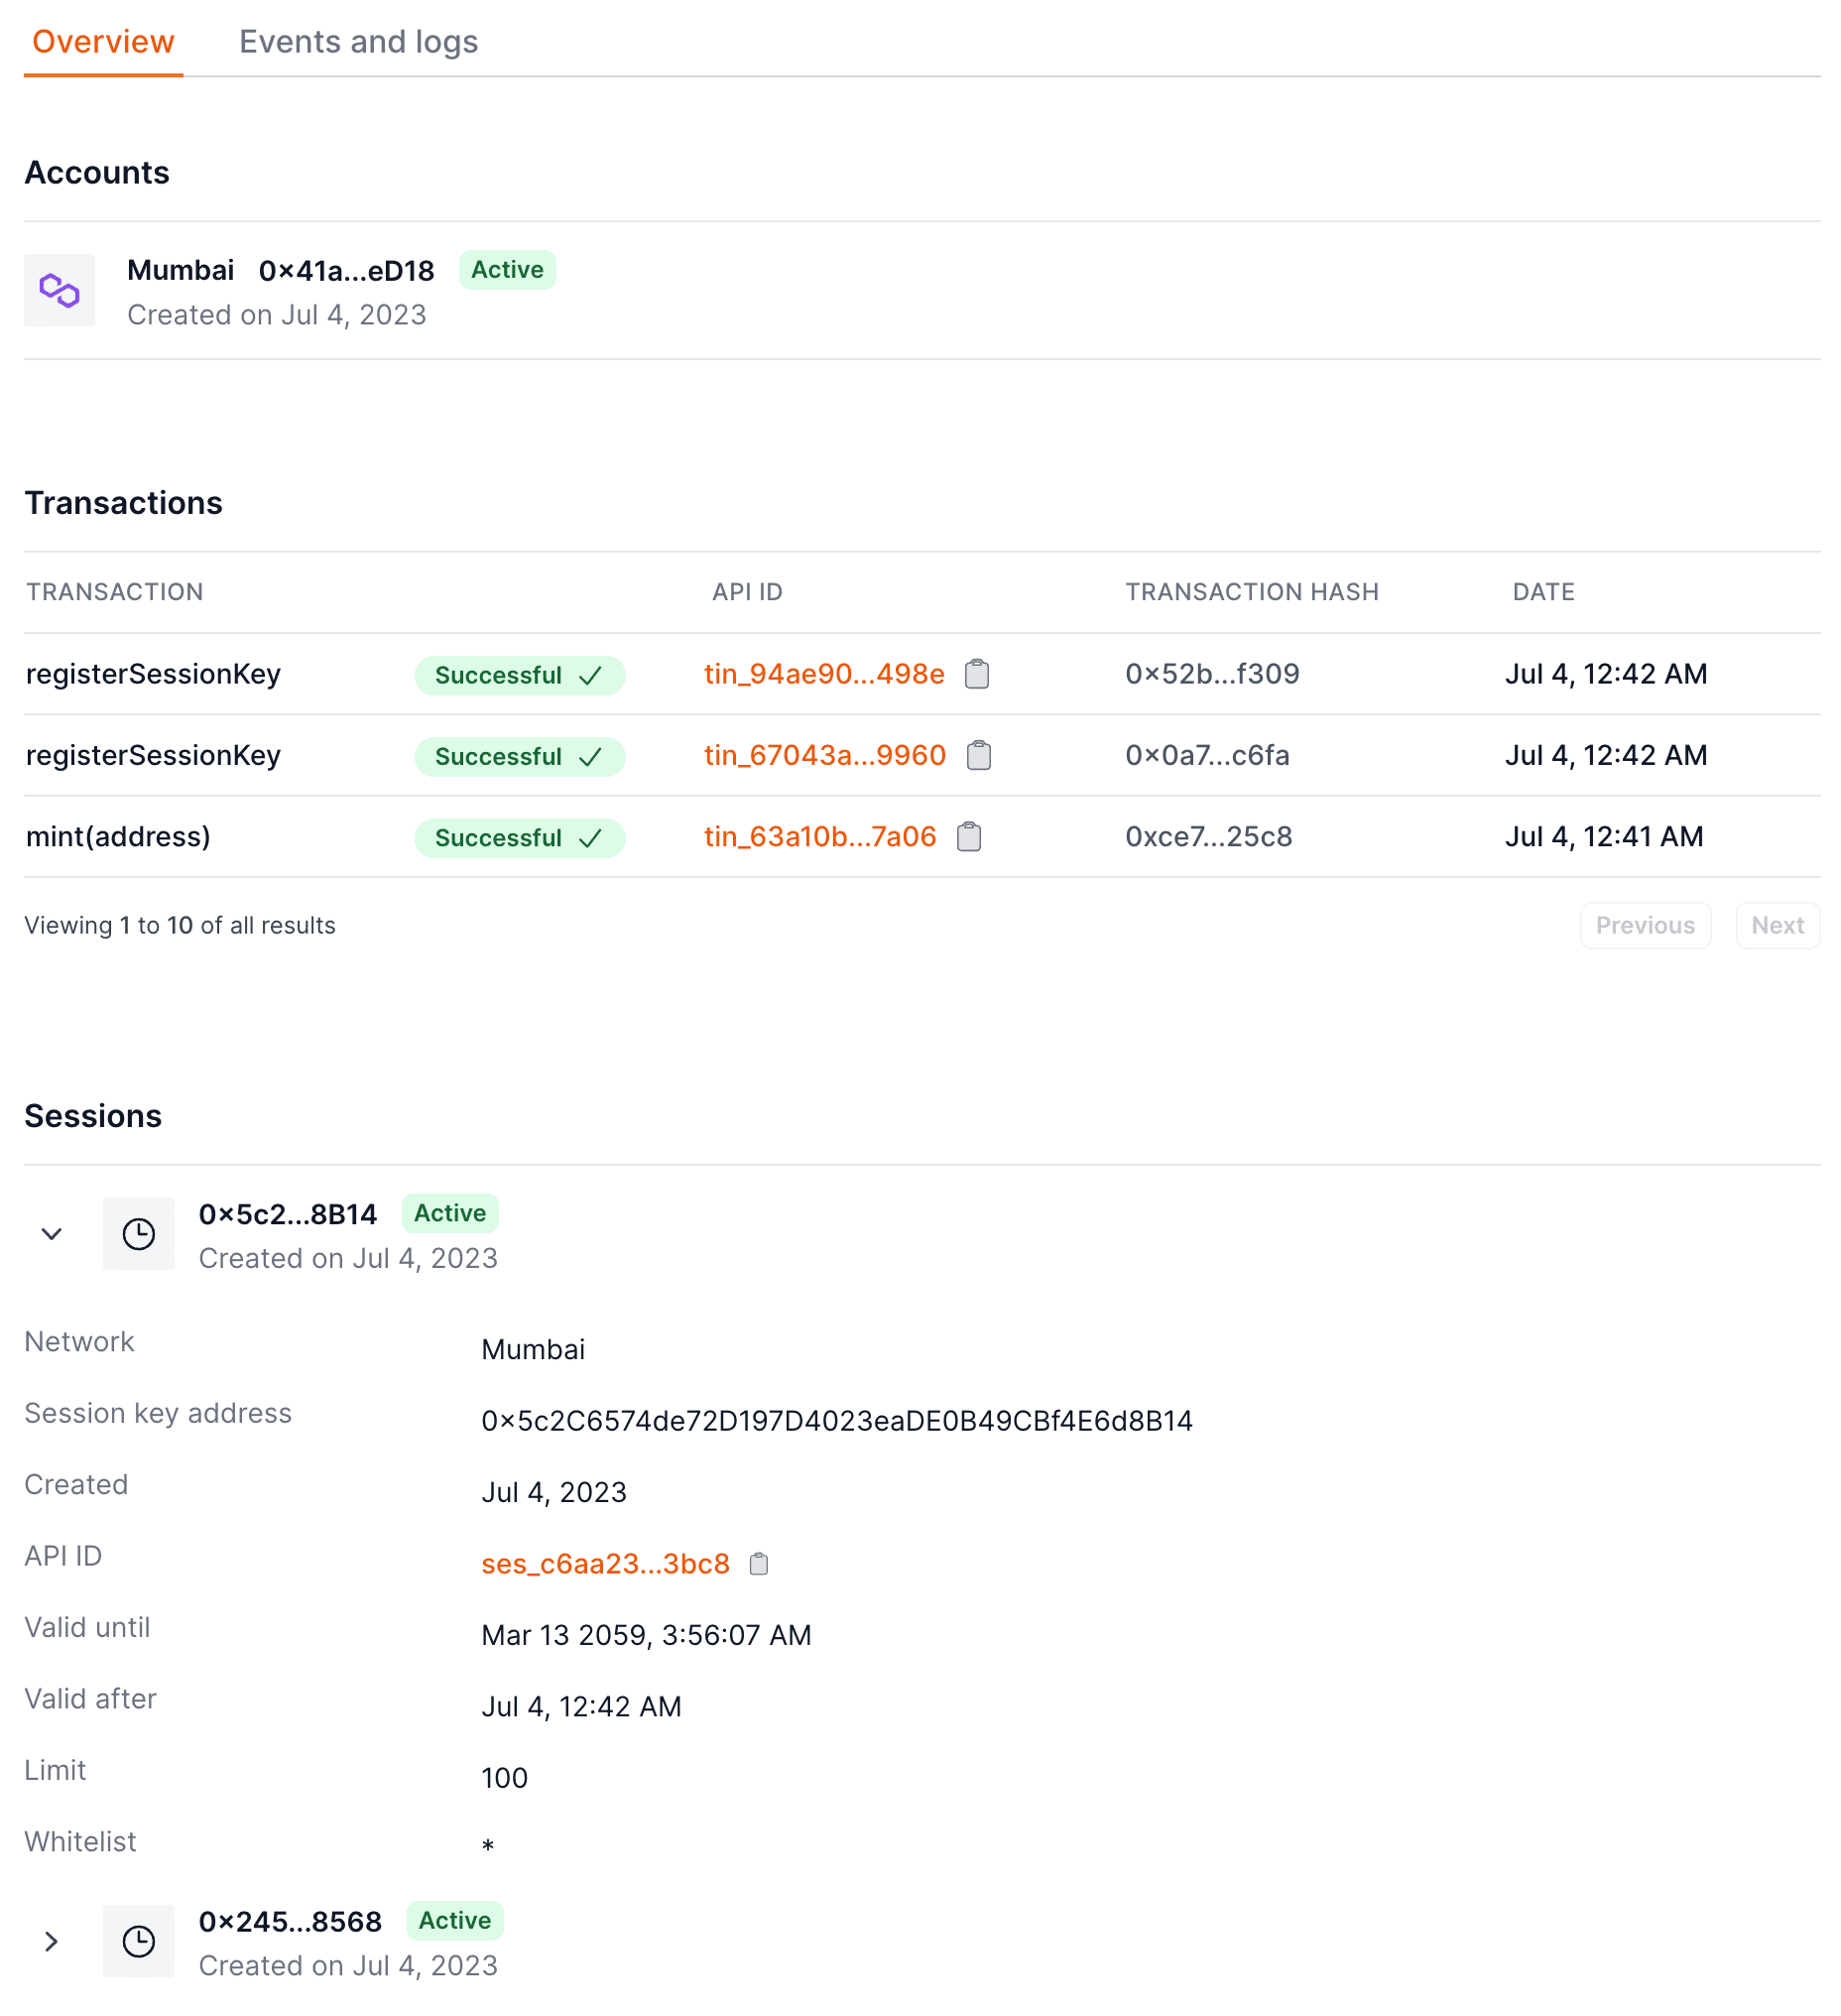
After registering the session key, you can see it in the dashboard under the user's page.
### 4. Using the session key - Server side Client side
After the session key is registered, it can be used to authenticate requests from the user.
Whenever you create a transaction intent from your backend, a signature is needed from the session key or owner of the users' smart account.
Create a transaction intent:
:::code-group
```bash [curl]
curl https://api.openfort.io/v1/transaction_intents \
-H "Authorization: Bearer $YOUR_SECRET_KEY" \
-H "Content-Type: application/json" \
-d '{
"account": "acc_...",
"chainId": 80002,
"policy": "pol_...",
"interactions": [{"contract": "con_...", "functionName": "mint", "functionArgs": ["0x..."]}]
}'
```
```ts [node]
const accountId = 'acc_...'
const policyId = "pol_...";
const contractId = "con_...";
const chainId = 80002;
const optimistic = true;
const interaction: Interaction = {
contract: contractId,
functionName: "mint",
functionArgs: ["0x..."],
};
const transactionIntent = await openfort.transactionIntents.create({
account: accountId,
chainId: chainId,
optimistic: optimistic,
interactions: [interaction],
policy: policyId,
})
```
:::
After creating the transaction intent, the session key needs to sign the nextAction `signableHash` and send it to Openfort.
The response of the call to transaction intents contains a `nextAction` object like this:
```json
"nextAction": {
"type": "sign_with_wallet",
"payload": {
"signableHash": "0x91b4efe3648c79467f7b50aa9bb1b4eae383a52dd6d741d39ece29ed2ef8362d"
}
},
```
### 5. Revoke a session key - Client side Server side
The owner of the account can always revoke the session key.
To do so, sign the `signableHash` from the `nextAction` object returned by the API call to revoke the session key.
:::code-group
```bash [curl]
curl https://api.openfort.io/v1/sessions/revoke \
-H "Authorization: Bearer $YOUR_SECRET_KEY" \
-d account=acc_... \
-d address="0x76e6...9341" \
-d chainId=80002 \
-d policy=pol_...
```
```ts [node]
const accountId = 'acc_...'
const policyId = 'pol_...'
const chainId = 80002
const sessionKeyAddress = '0x76e6...9341'
const revokeSession = await openfort.sessions.revoke({
account: accountId,
address: sessionKeyAddress,
chainId: chainId,
optimistic: true,
policy: policyId,
})
```
:::
Make sure to sign the `signableHash` with the owner account and send it to Openfort using the endpoint `/v1/sessions/:id/signature`.