# WebGL Setup
Openfort's Unity SDK leverages an iframe to secure the key material for a user's embedded wallet. Given the use of an iframe, we recommend testing builds with Openfort's Unity SDK in the browser, or on a non-WebGL platform in the Unity editor.
:::warning
WebGL builds run in the browser, so you must configure your hosting domain as an [allowed origin](/docs/configuration/allowed-domains). This differs from native iOS/Android builds, which use [allowed native apps](/docs/configuration/allowed-domains#native-apps) with bundle identifiers.
For example, if you host your WebGL build at `https://game.example.com`, add that domain to your allowed origins.
:::
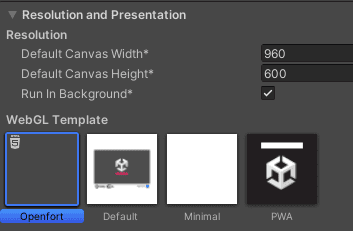
To configure settings for your WebGL build to work with Openfort, go to your Project Settings in the Unity editor. Next, select Player and navigate to WebGL. Set the following values:
* **In Resolution and Presentation**, select `openfort`.
* In **Other Settings/Optimization, set managed stripping level** to **minimal**