> **Can't find what you're looking for?** Use `search_docs` on the docs MCP server at `https://www.openfort.io/api/mcp` to find what you need.
>
> **Have feedback?** Use `submit_feedback` on the same MCP server.
# Firebase auth
Firebase is a development platform from Google that provides databases, analytics, messaging, and crash reporting for building apps.
Firebase Authentication stays the source of truth for identity. Openfort verifies the ID token Firebase issues and attaches an embedded wallet to the user behind it, so your existing sign-in flows keep working unchanged.
## Prerequisites
Navigate to **Project Settings** in the Firebase Console and copy your Firebase Project ID.
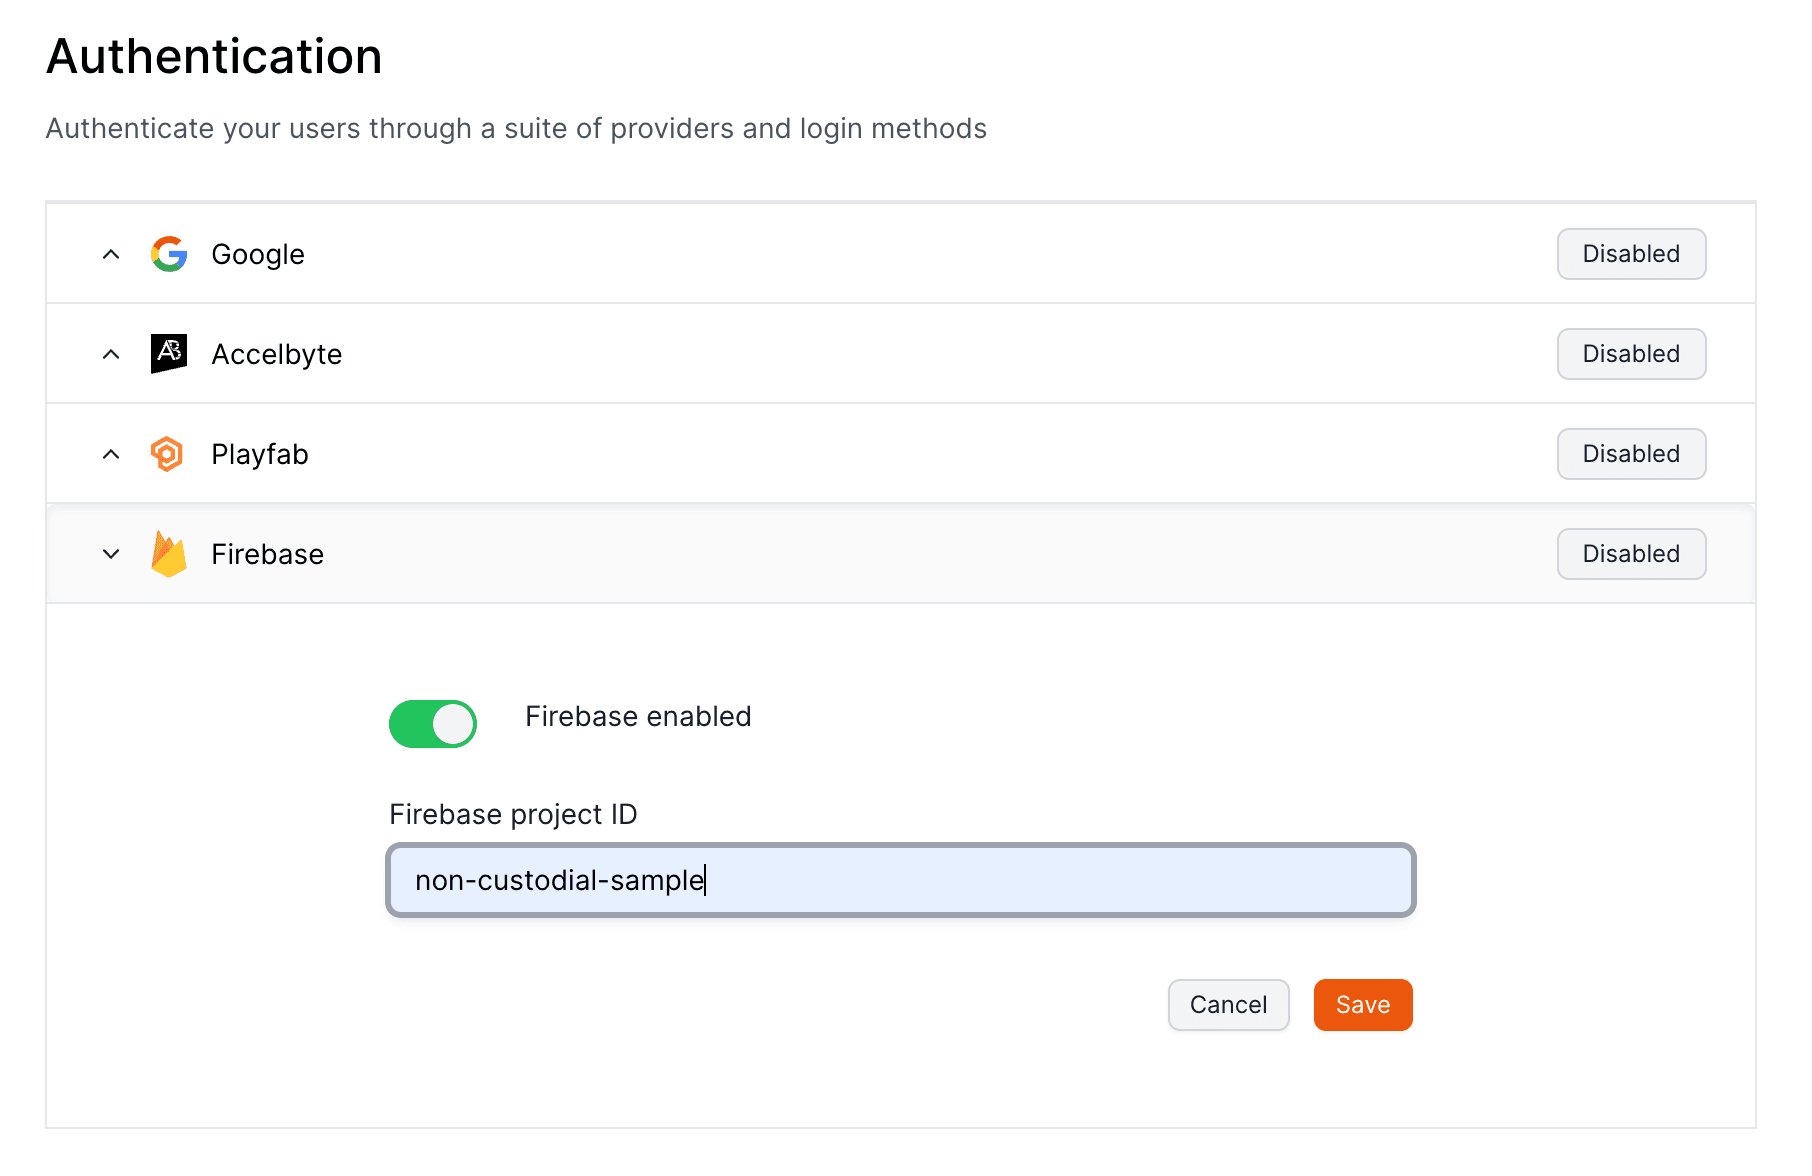
Project ID is the only field the Firebase provider config takes, alongside the flag that enables it. You also need your Openfort [publishable key](https://www.openfort.io/docs/configuration/api-keys) and, for embedded wallets, your Shield publishable key.
## Set up your provider
To set up Firebase to authenticate users with Openfort, visit your [dashboard provider settings](https://dashboard.openfort.io/providers).
 ## Use it in your app
Set `thirdPartyAuth` to `ThirdPartyOAuthProvider.FIREBASE` and return the current user's ID token from `getAccessToken`:
```tsx [Providers.tsx]
import React from "react"
import { OpenfortProvider, ThirdPartyOAuthProvider } from "@openfort/react"
import { auth as firebaseAuth } from "./lib/firebase"
export function Providers({ children }: { children: React.ReactNode }) {
const firebaseGetAccessToken = async () => {
const token = await firebaseAuth.currentUser?.getIdToken(false)
return token ?? null
}
return (
{children}
)
}
```
Then mirror Firebase's auth state onto Openfort: call `getAccessToken` from `onAuthStateChanged` when a user is present, and sign out of Openfort when there isn't one. [Using your own authentication](https://www.openfort.io/docs/products/embedded-wallet/react/auth/third-party) shows the full component, and the [Firebase quickstart](https://github.com/openfort-xyz/openfort-react/tree/main/examples/quickstarts/firebase#firebase-quickstart) is a working app.
## Verify it worked
Sign in with Firebase and call `getAccessToken`. On success Openfort verifies the Firebase ID token, links it to an Openfort user, and the user appears on the [Users](https://dashboard.openfort.io/users) page in the dashboard. A token from a different Firebase project than the configured Project ID fails verification with `400`.
## Next steps
* [Using a third-party auth provider](https://www.openfort.io/docs/configuration/external-auth) — the fields every provider needs, side by side.
* [Third-party auth providers](https://www.openfort.io/docs/products/embedded-wallet/javascript/auth/external-auth) — the same setup with the JavaScript SDK.
* [Recovery methods](https://www.openfort.io/docs/configuration/recovery-methods) — choose how the embedded wallet's recovery share is encrypted.
## Use it in your app
Set `thirdPartyAuth` to `ThirdPartyOAuthProvider.FIREBASE` and return the current user's ID token from `getAccessToken`:
```tsx [Providers.tsx]
import React from "react"
import { OpenfortProvider, ThirdPartyOAuthProvider } from "@openfort/react"
import { auth as firebaseAuth } from "./lib/firebase"
export function Providers({ children }: { children: React.ReactNode }) {
const firebaseGetAccessToken = async () => {
const token = await firebaseAuth.currentUser?.getIdToken(false)
return token ?? null
}
return (
{children}
)
}
```
Then mirror Firebase's auth state onto Openfort: call `getAccessToken` from `onAuthStateChanged` when a user is present, and sign out of Openfort when there isn't one. [Using your own authentication](https://www.openfort.io/docs/products/embedded-wallet/react/auth/third-party) shows the full component, and the [Firebase quickstart](https://github.com/openfort-xyz/openfort-react/tree/main/examples/quickstarts/firebase#firebase-quickstart) is a working app.
## Verify it worked
Sign in with Firebase and call `getAccessToken`. On success Openfort verifies the Firebase ID token, links it to an Openfort user, and the user appears on the [Users](https://dashboard.openfort.io/users) page in the dashboard. A token from a different Firebase project than the configured Project ID fails verification with `400`.
## Next steps
* [Using a third-party auth provider](https://www.openfort.io/docs/configuration/external-auth) — the fields every provider needs, side by side.
* [Third-party auth providers](https://www.openfort.io/docs/products/embedded-wallet/javascript/auth/external-auth) — the same setup with the JavaScript SDK.
* [Recovery methods](https://www.openfort.io/docs/configuration/recovery-methods) — choose how the embedded wallet's recovery share is encrypted.