> **Can't find what you're looking for?** Use `search_docs` on the docs MCP server at `https://www.openfort.io/api/mcp` to find what you need.
>
> **Have feedback?** Use `submit_feedback` on the same MCP server.
# AccelByte auth
AccelByte provides backend services for building and operating online games, including scalable cloud infrastructure, matchmaking, and cross-platform user accounts.
Once configured, Openfort verifies the access token AccelByte IAM issues for a player and attaches an embedded wallet to that player, so you keep AccelByte as the account system and add wallets on top of it.
## Prerequisites
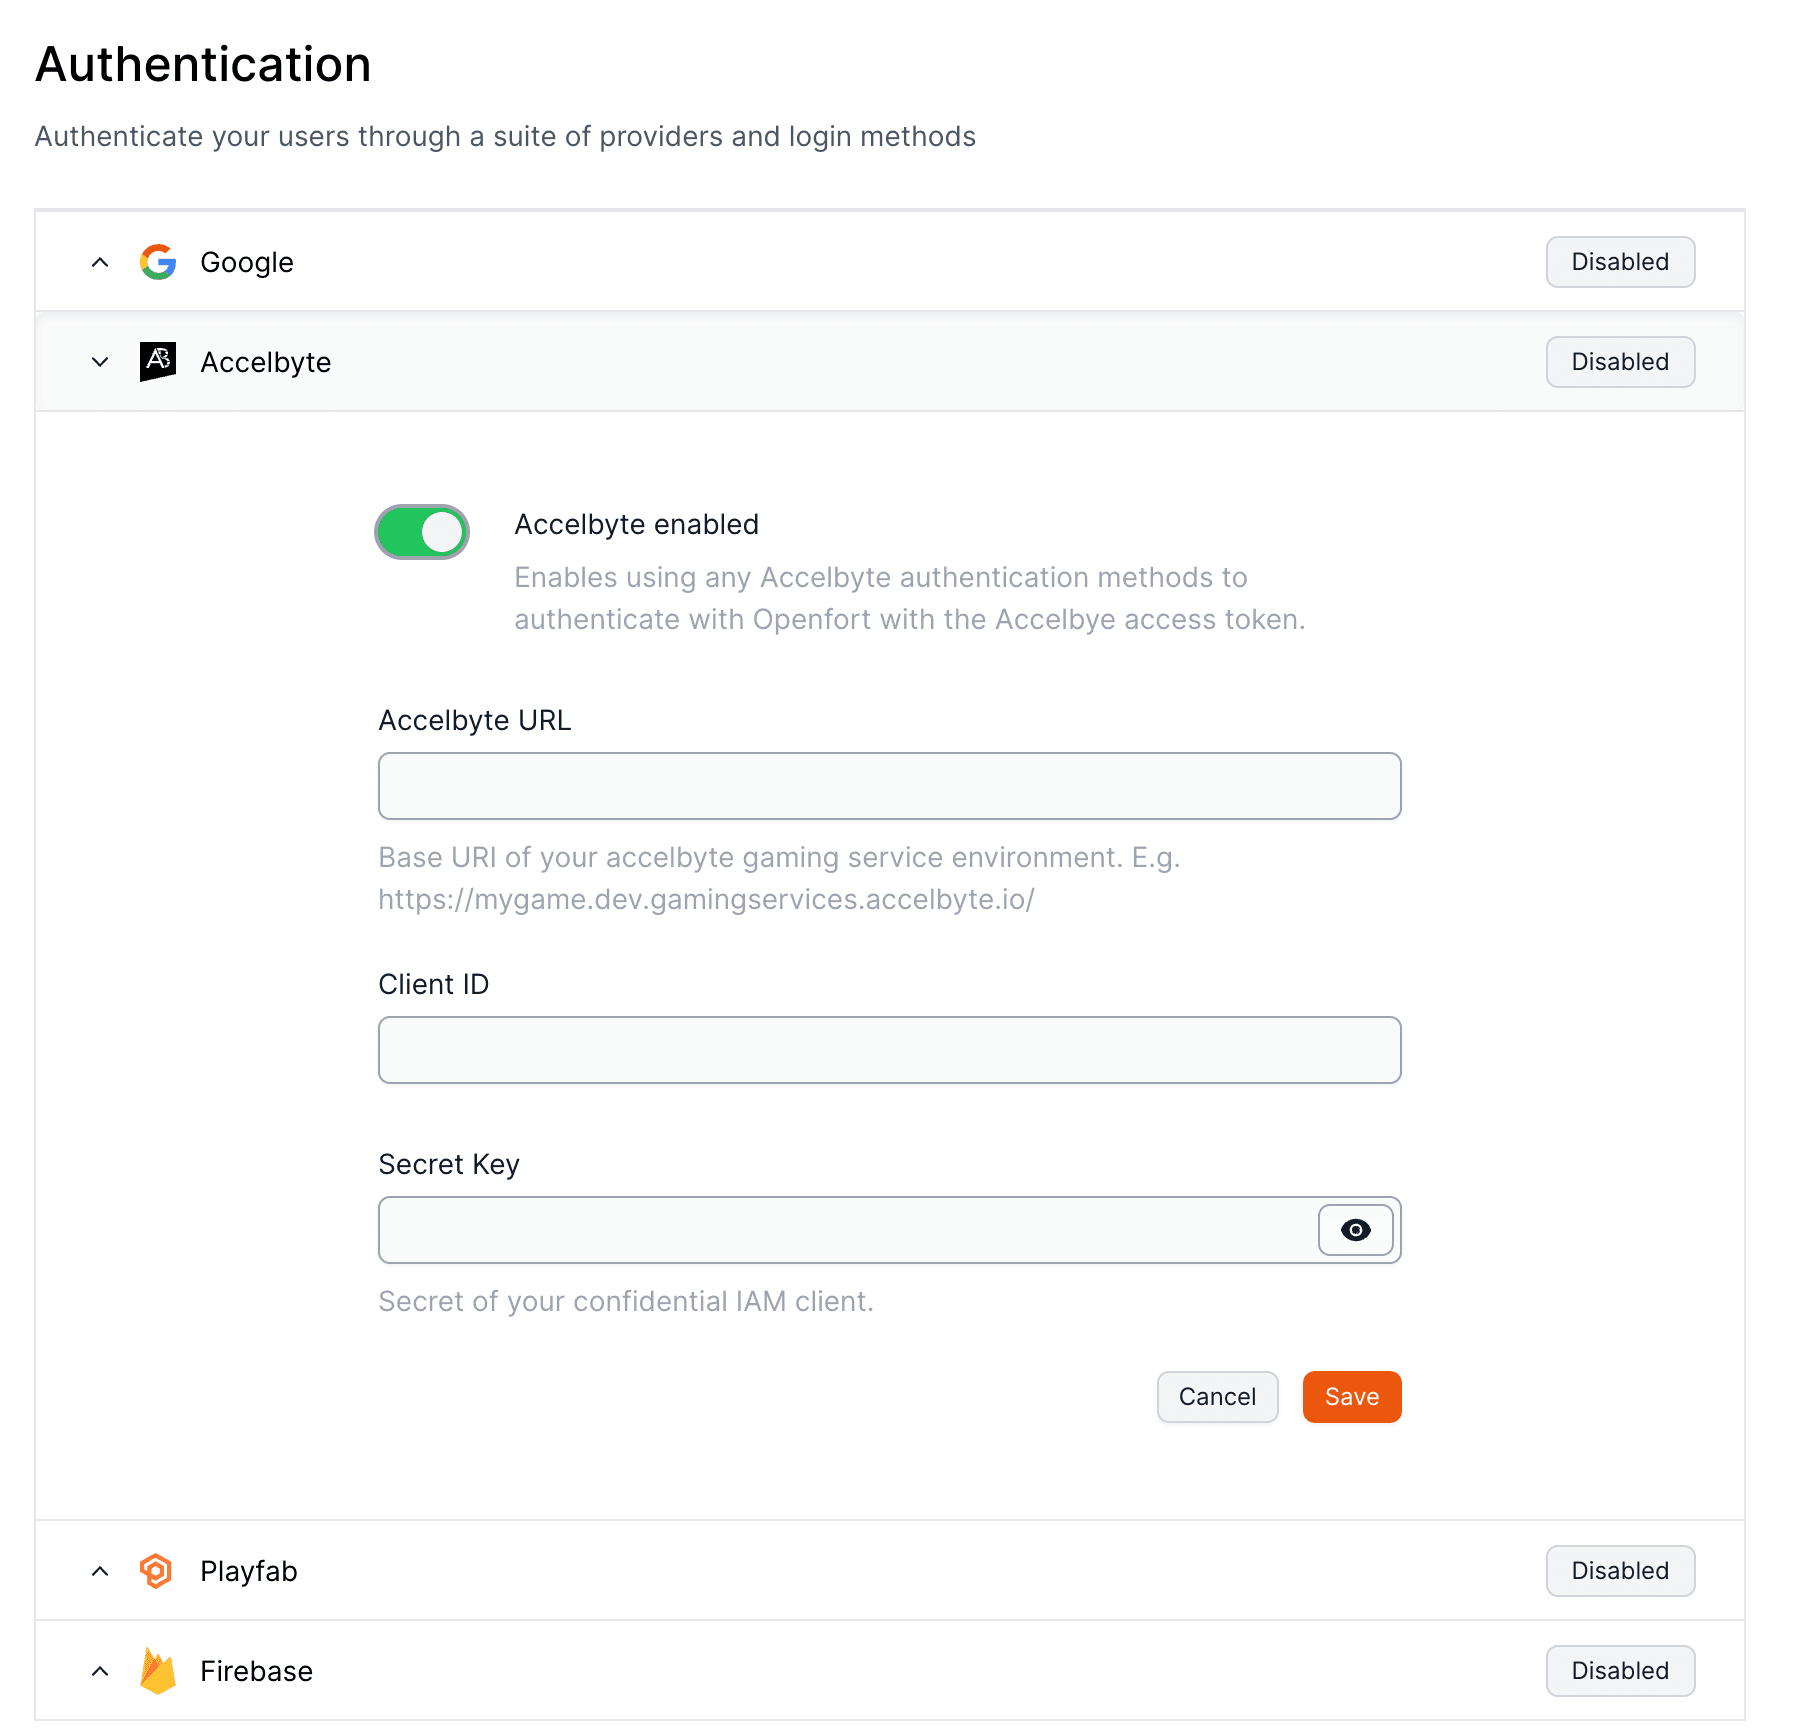
Collect three values from the AccelByte gaming service environment you want to connect, and a confidential IAM client in that environment:
| Field | Value |
| --- | --- |
| Base URL | Base URI of your AccelByte gaming service environment, for example `https://mygame.dev.gamingservices.accelbyte.io/` |
| Client ID | Client ID of that environment |
| Client secret | Secret of your confidential IAM client |
## Set up your provider
To set up AccelByte to authenticate users with Openfort, visit your [dashboard provider settings](https://dashboard.openfort.io/providers).
 ## Use it in your app
Point the SDK at the provider with `ThirdPartyOAuthProvider.ACCELBYTE` and return the player's current AccelByte access token from `getAccessToken`:
```tsx [Providers.tsx]
import React from "react"
import { OpenfortProvider, ThirdPartyOAuthProvider } from "@openfort/react"
// Your own helper: reads the access token your AccelByte client holds.
import { getAccelByteToken } from "./lib/accelbyte"
export function Providers({ children }: { children: React.ReactNode }) {
return (
(await getAccelByteToken()) ?? null,
}}
walletConfig={{
shieldPublishableKey: "YOUR_SHIELD_PUBLISHABLE_KEY",
ethereum: { chainId: 84532 },
}}
>
{children}
)
}
```
The same `thirdPartyAuth` shape works in the JavaScript SDK — see [Third-party auth providers](https://www.openfort.io/docs/products/embedded-wallet/javascript/auth/external-auth).
## Verify it worked
Sign a player in through AccelByte, then call `getAccessToken`. On success Openfort verifies the AccelByte token, links it to an Openfort user, and the player shows up on the [Users](https://dashboard.openfort.io/users) page in the dashboard. If Openfort cannot verify the token against the configured client, the request fails with `400`.
## Next steps
* [Using a third-party auth provider](https://www.openfort.io/docs/configuration/external-auth) — the fields every provider needs, side by side.
* [Using your own authentication](https://www.openfort.io/docs/products/embedded-wallet/react/auth/third-party) — full React wiring, including signing out.
* [Recovery methods](https://www.openfort.io/docs/configuration/recovery-methods) — choose how the embedded wallet's recovery share is encrypted.
## Use it in your app
Point the SDK at the provider with `ThirdPartyOAuthProvider.ACCELBYTE` and return the player's current AccelByte access token from `getAccessToken`:
```tsx [Providers.tsx]
import React from "react"
import { OpenfortProvider, ThirdPartyOAuthProvider } from "@openfort/react"
// Your own helper: reads the access token your AccelByte client holds.
import { getAccelByteToken } from "./lib/accelbyte"
export function Providers({ children }: { children: React.ReactNode }) {
return (
(await getAccelByteToken()) ?? null,
}}
walletConfig={{
shieldPublishableKey: "YOUR_SHIELD_PUBLISHABLE_KEY",
ethereum: { chainId: 84532 },
}}
>
{children}
)
}
```
The same `thirdPartyAuth` shape works in the JavaScript SDK — see [Third-party auth providers](https://www.openfort.io/docs/products/embedded-wallet/javascript/auth/external-auth).
## Verify it worked
Sign a player in through AccelByte, then call `getAccessToken`. On success Openfort verifies the AccelByte token, links it to an Openfort user, and the player shows up on the [Users](https://dashboard.openfort.io/users) page in the dashboard. If Openfort cannot verify the token against the configured client, the request fails with `400`.
## Next steps
* [Using a third-party auth provider](https://www.openfort.io/docs/configuration/external-auth) — the fields every provider needs, side by side.
* [Using your own authentication](https://www.openfort.io/docs/products/embedded-wallet/react/auth/third-party) — full React wiring, including signing out.
* [Recovery methods](https://www.openfort.io/docs/configuration/recovery-methods) — choose how the embedded wallet's recovery share is encrypted.